Quick DIY Animal Ears for Costumes
When it comes to costumes, attention to detail can make all the difference. Whether you're dressing up for Halloween, a costume party, or a theatrical production, adding animal ears can instantly transform your look and help you stand out from the crowd. While you can easily purchase pre-made animal ears online or at a costume store, why not get creative and make your own? In this blog post, we'll show you how to create quick DIY animal ears that are both budget-friendly and customizable to suit your needs.
Materials You Will Need:
- Foam sheets in desired colors
- A headband (preferably in a color that matches your hair)
- Fabric glue or hot glue gun
- Pencil or pen
- Scissors
- Straight pins (optional)
- Ribbon or fabric scraps (optional)
- Decorative materials like sequins, feathers, or faux fur (optional)
Step 1: Choose Your Animal and Ear Shape
The first step in creating your DIY animal ears is deciding on the type of animal you want to emulate. Are you going for something cute and cuddly like a bunny or a bear? Or do you prefer something more fierce and wild like a lion or a tiger?
Once you have chosen your animal, determine the shape of the ears. Bunnies typically have long floppy ears, while cats have pointy ears. You can find inspiration online or draw your own ear shape on a piece of paper.
Step 2: Trace and Cut Out the Ear Shapes
Using a pencil or pen, trace the ear shape onto the foam sheet. Make sure to trace two identical shapes for each ear. If you're confident in your drawing skills, you can also freehand the shape directly onto the foam sheet.
Once you have traced the shapes, carefully cut them out using scissors. Take your time and make sure to follow the lines as accurately as possible to achieve clean and symmetrical ears. If needed, use straight pins to hold the foam sheets together while cutting.
Step 3: Attach the Ears to the Headband
Now it's time to attach the ears to the headband. Place a thin line of fabric glue or hot glue along one edge of one ear shape, leaving a small gap at the bottom (where it will attach to the headband).
Press firmly against one end of the headband, lining up the bottom of the ear with it. Hold in place until secure, following any instructions provided by your chosen adhesive product.
Repeat this process for attaching the second ear to the opposite side of the headband, making sure they are symmetrical and evenly spaced. Allow time for drying if using fabric glue before moving on.
Step 4: Customize Your Animal Ears (Optional)
If you want to add some personal flair or make your animal ears more realistic, now is your chance! Get creative with decorative materials like sequins, feathers, or faux fur.
You can add sequins to create a sparkly effect, glue feathers to mimic a bird's ears, or attach faux fur to give your animal ears a realistic texture. Use fabric glue or hot glue gun to secure these additional materials in place.
Step 5: Add Finishing Touches
To hide any visible glue or attachment points, you can wrap ribbon or fabric scraps around the bottom of each ear where it connects to the headband. This not only provides a clean and finished look but also adds an extra touch of style.
If desired, you can also paint the foam ears using acrylic paint to match your costume color scheme or add some patterns for added interest.
Step 6: Let It Dry and Test It Out!
Allow your DIY animal ears to dry completely before testing them out. Once dry, put on the headband and adjust the ears as needed. Ensure they're securely attached and sit at a position that looks natural and comfortable on your head.
Now you're ready to go! Pair your DIY animal ears with an appropriate outfit, whether it's a full-on animal costume or just something that complements the theme. Have fun experimenting with different animals, colors, and styles to create a unique look that suits your personality.
In Conclusion
Creating quick DIY animal ears for costumes doesn't have to be complicated or expensive. With just a few simple materials and some creativity, you can make your own customized animal ears that will elevate your costume game to the next level.
So why settle for store-bought options when you can showcase your crafting skills and stand out from the crowd with unique handmade accessories?
Give this easy DIY project a try and see how your animal ears become the talk of the party!
Featured collection


Original price
$27.95
-
Original price
$27.95
Original price
$27.95
$27.95
-
$27.95
Current price
$27.95
Sexy Post Office Girl | Costume-Shop.com
In stock
Attention all aspiring letter carriers and mail enthusiasts! Prepare to deliver a package of seductive style and naughty charm with our Sexy Post O...
View full details
Original price
$27.95
-
Original price
$27.95
Original price
$27.95
$27.95
-
$27.95
Current price
$27.95


Original price
$110.95
-
Original price
$110.95
Original price
$110.95
$110.95
-
$110.95
Current price
$110.95
Northern Warrior Costume | Costume-Shop.com
Low stock
Upgrade your costume game to legendary status with the Northern Warrior Costume! Designed for rugged adventurers and fearless warriors of the North...
View full details
Original price
$110.95
-
Original price
$110.95
Original price
$110.95
$110.95
-
$110.95
Current price
$110.95
Original price
$66.95
-
Original price
$66.95
Original price
$66.95
$66.95
-
$66.95
Current price
$66.95
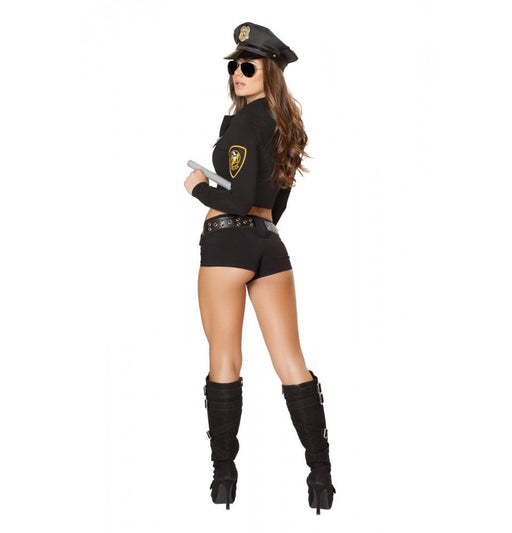
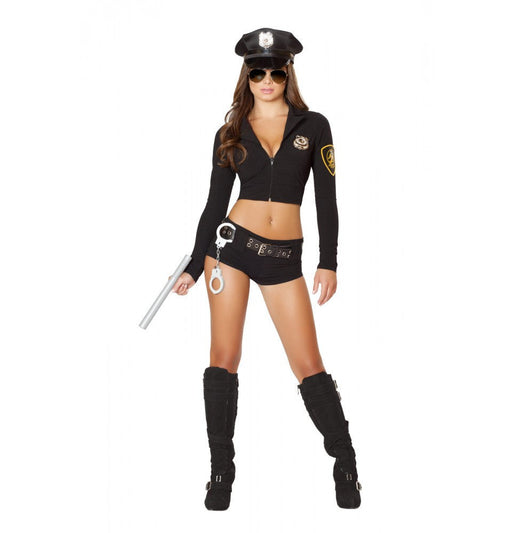
Sexy Police Officer Hottie | Costume-Shop.com
Low stock
🚓 Enforce Fun with a Dash of Flair! Step into the role of authority with the Sexy Police Officer Hottie Costume from www.Costume-shop.com. Designed...
View full details
Original price
$66.95
-
Original price
$66.95
Original price
$66.95
$66.95
-
$66.95
Current price
$66.95


Original price
$97.95
-
Original price
$97.95
Original price
$97.95
$97.95
-
$97.95
Current price
$97.95
Sexy Miss Claus Costume | Costume-Shop.com
Low stock
C170Sexy Miss Claus Costume Includes:Long Robe with Fur Trim Detail, Detachable Belt, & Shorts Material:Stretch Velvet Ships From:Los Angeles S...
View full details
Original price
$97.95
-
Original price
$97.95
Original price
$97.95
$97.95
-
$97.95
Current price
$97.95
Original price
$73.95
-
Original price
$73.95
Original price
$73.95
$73.95
-
$73.95
Current price
$73.95
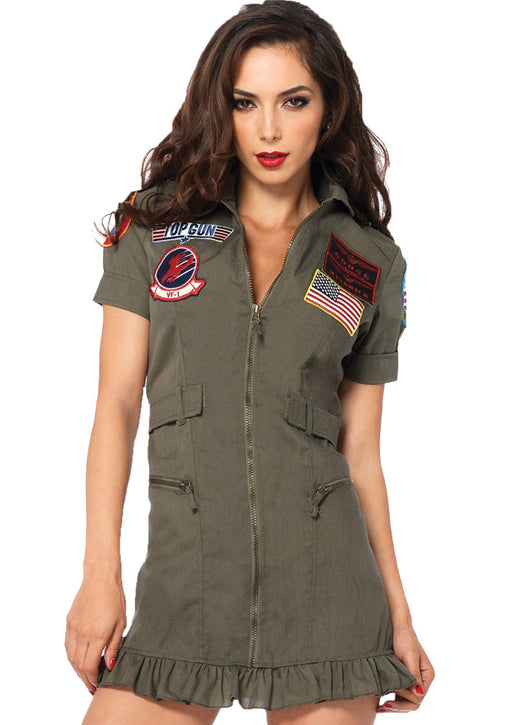
Top Gun Flight Dress | Costume-shop.com
In stock
✈️ Feel the Need for Speed! Elevate your costume game at your next party, Halloween event, or any gathering calling for a bit of high-flying action...
View full details
Original price
$73.95
-
Original price
$73.95
Original price
$73.95
$73.95
-
$73.95
Current price
$73.95
Leave a comment