How to Apply Halloween Prosthetics - A Step-by-Step Guide
Introduction
Halloween is just around the corner, and if you're looking to take your costume to the next level, using prosthetics can be a game-changer. Whether you want to transform into a spooky zombie, a mystical creature, or an iconic movie character, prosthetics can help you achieve a stunning and realistic look.
In this step-by-step guide, we'll walk you through the process of applying Halloween prosthetics like a pro. From prepping your skin to blending the edges seamlessly, these tips and techniques will ensure that your prosthetic application looks flawless and lasts all night.
Step 1: Gather Your Supplies
Before you start applying prosthetics, make sure you have all the necessary supplies on hand. Here's a list of items you'll need:
- Cleanse your face thoroughly with a gentle cleanser and warm water. Pat dry with a clean towel.
- Adhesive: Depending on the type of prosthetic you're using (latex or silicone), choose an adhesive that works best for that material.
- Spirit gum remover: To remove any excess adhesive or prosthetic at the end of the night.
- Cosmetic sponges or brushes: These will help you apply and blend the adhesive and makeup.
- Pros-Aide: A popular medical adhesive used in special effects makeup that provides a strong hold.
- Powder or setting spray: To set your makeup and ensure it lasts throughout the night.
- Makeup palette: Choose colors that match your desired look. For example, if you're going for a zombie, you'll need shades of gray, black, and red.
- Makeup brushes: Different sizes and shapes for various applications.
- Fake blood: Optional, but adds an extra touch of realism to your costume.
Once you have all your supplies ready, move on to the next step.
Step 2: Prep Your Skin
Before applying prosthetics, it's essential to prepare your skin properly. Follow these steps:
- Cleanse your face thoroughly with a gentle cleanser and warm water. Pat dry with a clean towel.
- If necessary, shave the area where you plan to apply the prosthetic. This step is especially important for men with facial hair as it helps create a smooth surface for better adhesion.
- Gently exfoliate the skin using a scrub or exfoliating gloves. This step removes dead skin cells that could interfere with the prosthetic application process.
- Apply a thin layer of moisturizer to hydrate your skin. Make sure it's fully absorbed before moving on to the next step.
In areas where sweat is more likely, like on the forehead or under the eyes, apply an oil-free primer. This will help prevent excess moisture from causing the prosthetic to lift.
Once your skin is prepped and ready, it's time to start applying the prosthetic.
Step 3: Apply the Prosthetic
Now that your skin is ready, it's time to apply the prosthetic. Follow these steps:
- Carefully remove the prosthetic from its packaging and position it on your face or body. Take note of where you want it to sit so you can align it correctly.
- Using a cosmetic sponge or brush, apply a thin layer of adhesive onto the backside of the prosthetic and on your skin in the desired area of application.
- Wait for a few seconds until the adhesive becomes tacky. This step ensures better adhesion between the prosthetic and your skin.
- Gently press the prosthetic onto your skin, starting from one edge and working towards the other. Use your fingertips or a clean sponge to smooth out any wrinkles or air bubbles.
- Hold down each section firmly for about 30 seconds to ensure proper adhesion. Repeat this process for all edges and corners of the prosthetic.
- If needed, trim any excess material with scissors for a more precise fit.
Once you have applied the prosthetic, move on to blending it seamlessly with your skin using makeup techniques.
Step 4: Blend with Makeup
The final step in achieving a realistic and seamless look with Halloween prosthetics is blending them with makeup. Here's what you need to do:
- Using a makeup brush or sponge, apply foundation or concealer that matches your skin tone all over the prosthetic and surrounding areas.
- Gently blend the edges of the prosthetic into your skin using small circular motions. This step is crucial for achieving a natural-looking finish.
- Add shading and highlights to create depth and dimension. For example, if you're wearing a zombie prosthetic, use shades of gray and black to create shadows around the eyes, nose, and mouth.
- Add any additional details like veins, scars, or wounds using special effects makeup products.
- Set your makeup with powder or setting spray to ensure it stays in place throughout the night.
Once you have finished blending and adding details, take a step back and admire your professional-looking Halloween prosthetic application!
Conclusion
Applying Halloween prosthetics can elevate your costume to new heights and impress everyone at the party. By following this step-by-step guide, you'll be able to apply prosthetics like a pro.
Remember to gather all the necessary supplies beforehand, prep your skin properly, apply the prosthetic carefully, and blend it seamlessly with makeup. With practice and creativity, you'll soon become an expert in creating jaw-dropping Halloween looks using prosthetics!
Featured collection


Original price
$27.95
-
Original price
$27.95
Original price
$27.95
$27.95
-
$27.95
Current price
$27.95
Sexy Post Office Girl | Costume-Shop.com
In stock
Attention all aspiring letter carriers and mail enthusiasts! Prepare to deliver a package of seductive style and naughty charm with our Sexy Post O...
View full details
Original price
$27.95
-
Original price
$27.95
Original price
$27.95
$27.95
-
$27.95
Current price
$27.95


Original price
$110.95
-
Original price
$110.95
Original price
$110.95
$110.95
-
$110.95
Current price
$110.95
Northern Warrior Costume | Costume-Shop.com
Low stock
Upgrade your costume game to legendary status with the Northern Warrior Costume! Designed for rugged adventurers and fearless warriors of the North...
View full details
Original price
$110.95
-
Original price
$110.95
Original price
$110.95
$110.95
-
$110.95
Current price
$110.95

Original price
$66.95
-
Original price
$66.95
Original price
$66.95
$66.95
-
$66.95
Current price
$66.95
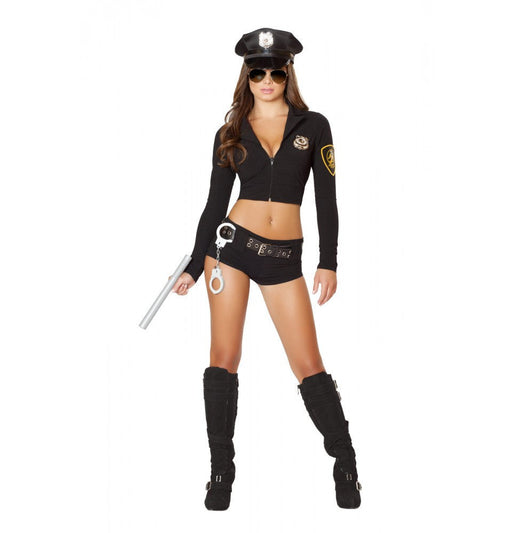
Sexy Police Officer Hottie | Costume-Shop.com
Low stock
🚓 Enforce Fun with a Dash of Flair! Step into the role of authority with the Sexy Police Officer Hottie Costume from www.Costume-shop.com. Designed...
View full details
Original price
$66.95
-
Original price
$66.95
Original price
$66.95
$66.95
-
$66.95
Current price
$66.95


Original price
$97.95
-
Original price
$97.95
Original price
$97.95
$97.95
-
$97.95
Current price
$97.95
Sexy Miss Claus Costume | Costume-Shop.com
Low stock
C170Sexy Miss Claus Costume Includes:Long Robe with Fur Trim Detail, Detachable Belt, & Shorts Material:Stretch Velvet Ships From:Los Angeles S...
View full details
Original price
$97.95
-
Original price
$97.95
Original price
$97.95
$97.95
-
$97.95
Current price
$97.95
Original price
$73.95
-
Original price
$73.95
Original price
$73.95
$73.95
-
$73.95
Current price
$73.95
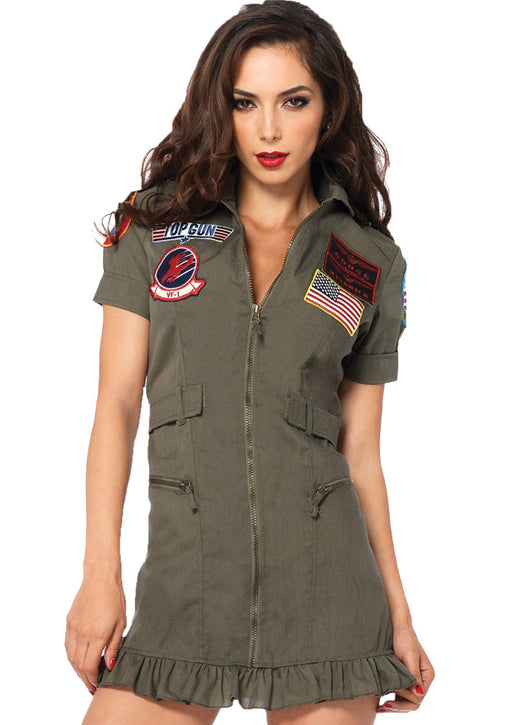
Top Gun Flight Dress | Costume-shop.com
In stock
✈️ Feel the Need for Speed! Elevate your costume game at your next party, Halloween event, or any gathering calling for a bit of high-flying action...
View full details
Original price
$73.95
-
Original price
$73.95
Original price
$73.95
$73.95
-
$73.95
Current price
$73.95
Leave a comment