Homemade Fairy Wings for Kids' Costumes
Fairy costumes are a popular choice among kids, especially for Halloween or dress-up parties. The magical and enchanting world of fairies sparks their imagination and allows them to explore their creativity. While store-bought fairy wings are readily available, making homemade fairy wings can be a fun and rewarding activity for both parents and children. In this blog post, we will guide you through the process of creating unique and beautiful homemade fairy wings that will complete your child's costume.
Materials Needed
Before we start, let's gather all the materials needed to make the homemade fairy wings:
- Wire hangers
- Pantyhose or tights in desired colors
- Elastic bands or ribbons
- Glitter, sequins, or other decorative elements
- Scissors
- Pliers (optional)
- Hot glue gun or fabric glue
Step-by-Step Guide
Now that we have all the necessary materials, let's dive into the step-by-step process of making homemade fairy wings:
Step 1: Shaping the Wire Hangers
The first step is to shape the wire hangers into wing-like structures. Start by bending one hanger into a semi-circle shape. This will form one half of the wings. Repeat the same process with another hanger. You can use pliers to help with bending and shaping the wire if needed.
Step 2: Connecting the Hangers
Next, connect the two semi-circles to create a set of wings. Place the ends of one hanger inside the other, forming a cross shape. Use pliers or twist the wires together securely. Make sure the connection is tight and stable, as it will support the weight of the fabric.
Step 3: Adding Elastic Bands or Ribbons
Attach elastic bands or ribbons to each end of the wing structure. These will be used to secure the wings onto your child's shoulders. Measure and cut the elastic bands or ribbons according to your child's size, ensuring they are long enough to be tied comfortably.
Step 4: Covering with Pantyhose or Tights
Now it's time to cover the wire frame with pantyhose or tights in your desired color. Stretch the fabric over each wing, smoothing out any wrinkles or creases. Trim off any excess fabric, leaving a small margin around the edges for easier attachment later on.
Step 5: Decorating the Wings
This step is where you can let your creativity shine! Decorate the wings with glitter, sequins, or any other decorative elements you like. Apply hot glue or fabric glue onto desired areas and carefully place glitter or sequins on top. Let them dry completely before moving on to prevent any accidental smudging.
Tips and Tricks
To make your homemade fairy wings even more special, consider these tips and tricks:
- Experiment with different colors and patterns of pantyhose or tights to create unique wing designs.
- Add additional layers of fabric for a more opaque look.
- Use ribbons or fabric scraps instead of elastic bands for an extra touch of elegance.
- Try incorporating feathers, faux flowers, or leaves for a whimsical touch.
- Encourage your child to participate in the decorating process to make the wings truly their own.
Conclusion
Making homemade fairy wings for your child's costume can be a delightful and memorable experience. Not only does it allow you to create one-of-a-kind wings tailored to your child's preferences, but it also provides an opportunity for bonding and creative expression. So why not give it a try? Gather the materials, follow our step-by-step guide, and watch your child's imagination soar as they transform into a beautiful fairy!
Featured collection


Original price
$27.95
-
Original price
$27.95
Original price
$27.95
$27.95
-
$27.95
Current price
$27.95
Sexy Post Office Girl | Costume-Shop.com
In stock
Attention all aspiring letter carriers and mail enthusiasts! Prepare to deliver a package of seductive style and naughty charm with our Sexy Post O...
View full details
Original price
$27.95
-
Original price
$27.95
Original price
$27.95
$27.95
-
$27.95
Current price
$27.95


Original price
$110.95
-
Original price
$110.95
Original price
$110.95
$110.95
-
$110.95
Current price
$110.95
Northern Warrior Costume | Costume-Shop.com
Low stock
Upgrade your costume game to legendary status with the Northern Warrior Costume! Designed for rugged adventurers and fearless warriors of the North...
View full details
Original price
$110.95
-
Original price
$110.95
Original price
$110.95
$110.95
-
$110.95
Current price
$110.95
Original price
$66.95
-
Original price
$66.95
Original price
$66.95
$66.95
-
$66.95
Current price
$66.95
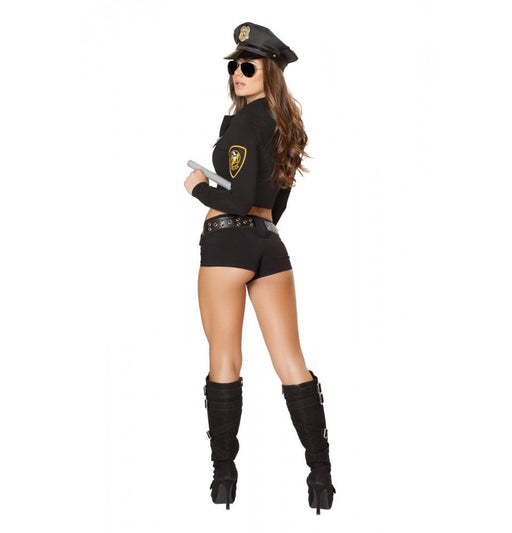
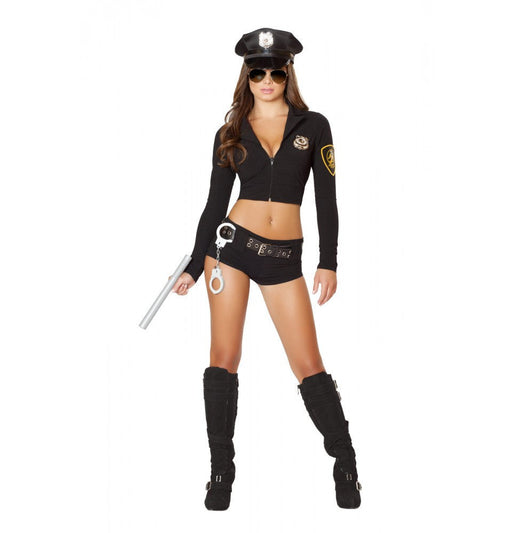
Sexy Police Officer Hottie | Costume-Shop.com
Low stock
🚓 Enforce Fun with a Dash of Flair! Step into the role of authority with the Sexy Police Officer Hottie Costume from www.Costume-shop.com. Designed...
View full details
Original price
$66.95
-
Original price
$66.95
Original price
$66.95
$66.95
-
$66.95
Current price
$66.95


Original price
$97.95
-
Original price
$97.95
Original price
$97.95
$97.95
-
$97.95
Current price
$97.95
Sexy Miss Claus Costume | Costume-Shop.com
Low stock
C170Sexy Miss Claus Costume Includes:Long Robe with Fur Trim Detail, Detachable Belt, & Shorts Material:Stretch Velvet Ships From:Los Angeles S...
View full details
Original price
$97.95
-
Original price
$97.95
Original price
$97.95
$97.95
-
$97.95
Current price
$97.95
Original price
$73.95
-
Original price
$73.95
Original price
$73.95
$73.95
-
$73.95
Current price
$73.95
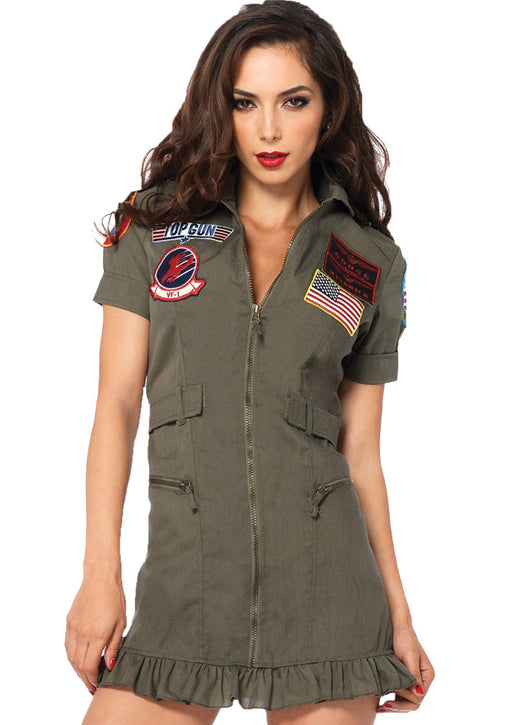
Top Gun Flight Dress | Costume-shop.com
In stock
✈️ Feel the Need for Speed! Elevate your costume game at your next party, Halloween event, or any gathering calling for a bit of high-flying action...
View full details
Original price
$73.95
-
Original price
$73.95
Original price
$73.95
$73.95
-
$73.95
Current price
$73.95
Leave a comment