Expert Support
Available 24/7 via chat
Available 24/7 via chat
Available 24/7 via chat
Available 24/7 via chat
So you've decided to dive into the incredible world of cosplay. Whether you're inspired by anime characters, video game heroes, or comic book legends, making your first cosplay costume is an exciting journey that combines creativity, craftsmanship, and passion. This comprehensive guide will walk you through everything you need to know about how to make a cosplay costume from start to finish—no prior experience required.
Before we jump into the technical details, let's talk about why creating your own cosplay costume is such a rewarding experience.
One of the biggest advantages of DIY cosplay is the money you'll save. Pre-made costumes from professional cosplay shops can easily run $300-$800 or more for a single outfit. When you make your own costume, you're typically looking at $50-$200 for materials, depending on the complexity of your character. That's a significant difference, especially if you're planning to build multiple costumes or attend several conventions throughout the year.
When you purchase a pre-made costume, you're limited to someone else's interpretation of the character. Making your own cosplay gives you complete creative control. Want to add weathering effects to make your armor look battle-worn? Go for it. Prefer a specific shade of blue that matches the original character art exactly? You can make that happen. This creative freedom allows you to bring your unique vision to life and stand out from the crowd.
Cosplay for beginners might seem intimidating, but it's actually one of the best ways to learn practical skills that extend far beyond costume making. You'll develop abilities in sewing, painting, sculpting, problem-solving, and project management. Many cosplayers have turned these hobby skills into professional careers in costume design, prop making, theatrical production, and more.
The cosplay community is known for being incredibly supportive and collaborative. When you make your own costumes, you become part of a global network of creators who share tutorials, troubleshooting advice, and encouragement. You'll find that most experienced cosplayers remember their first costume and are eager to help newcomers succeed.
There's something magical about wearing a costume you made with your own hands. The pride you'll feel when someone asks for a photo or compliments your craftsmanship is unlike anything else. Every time you put on that costume, you'll remember the challenges you overcame and the skills you developed along the way.
Picking the right character for your first project is crucial to your success and enjoyment. Here's how to make a smart choice that sets you up for a positive experience.
Be honest with yourself about your current abilities. If you've never sewn before, don't start with a character who has elaborate embroidery and twelve different fabric types. Instead, look for characters with:
Some excellent beginner-friendly characters include:
Different characters require vastly different budgets. Before committing to a character, research what materials they'll need. A character covered head-to-toe in EVA foam armor will cost more than someone in everyday clothes. Factor in:
While it's important to cosplay characters you love, consider how recognizable they are to others. A main character from a popular series will get more recognition at conventions than an obscure side character from a lesser-known show. This recognition leads to more photo opportunities and interactions with fellow fans, which can be incredibly validating for beginners.
Your first cosplay will likely be worn for several hours at a convention or event. Choose a character whose costume allows for:
A costume that looks amazing but leaves you miserable after 30 minutes won't be worth the effort.
At the end of the day, choose a character you genuinely love. You'll be spending dozens of hours working on this costume, and that passion will carry you through the frustrating moments. When you love the character, the research becomes fun, the challenges become puzzles to solve, and the finished product means so much more.
Building a beginner cosplay guide wouldn't be complete without a thorough equipment list. Here's what you'll need to get started, organized by category.
If your costume involves fabric (and most do), you'll need basic sewing supplies:
Sewing Machine ($80-$200): You don't need a fancy machine for cosplay. A basic model from Brother, Singer, or Janome works perfectly. Look for one that can:
Hand Sewing Needles ($5-$10): Essential for detail work, repairs, and areas the machine can't reach. Get a variety pack with different sizes.
Thread ($10-$20): Invest in quality thread that matches your fabric colors. Gutermann and Coats & Clark are reliable brands.
Fabric Scissors ($15-$30): Never use these on paper! Quality fabric scissors (like Gingher or Fiskars) make cutting so much easier and more accurate.
Measuring Tools ($10-$15): Flexible measuring tape, clear ruler, and fabric marking pens or chalk.
Pins and Pin Cushion ($5-$10): For holding fabric in place while sewing.
Seam Ripper ($3-$5): For fixing mistakes (everyone makes them!).
EVA foam is the most popular material for cosplay armor and props because it's lightweight, affordable, and beginner-friendly:
EVA Foam Sheets ($15-$40): Available in various thicknesses (2mm-10mm). Start with 5mm for general use. Brands like TNT Cosplay Supply and Foam Factory are popular.
Heat Gun ($20-$40): For shaping foam. A Wagner or Genesis heat gun works great.
Craft Knife/Exacto ($5-$15): For precise cuts. Get extra blades!
Contact Cement ($8-$15): Barge or Weldwood cement bonds foam pieces permanently.
Hot Glue Gun ($10-$20): For temporary holds and detail work.
Dremel or Rotary Tool ($30-$80): Optional but helpful for creating texture and beveled edges.
For more advanced armor and structural pieces:
Worbla ($25-$60 per sheet): Heat-activated thermoplastic that becomes moldable. Worbla's Finest Art is the most popular type. One sheet covers about 1.5 square feet.
Wonderflex ($20-$40 per yard): Similar to Worbla but with a fabric backing for extra strength.
Fosshape ($15-$30 per yard): Heat-activated felt that's great for hats and structured fabric pieces.
Making costumes look professional requires good finishing:
Primer/Sealer ($10-$20): Plasti Dip ($8-$15 per can) or Mod Podge ($5-$10 per bottle) seal foam and create a smooth painting surface.
Acrylic Paints ($15-$40): Craft acrylics work fine for beginners. Apple Barrel and Folk Art are budget-friendly. For better coverage, try Golden or Liquitex.
Paint Brushes ($10-$25): Get a variety pack of synthetic brushes in different sizes.
Spray Paint ($15-$30): For large, even coverage. Rust-oleum and Krylon offer metallic and specialty finishes.
Clear Sealer ($8-$15): Protects your paint job. Mod Podge, Minwax Polycrylic, or clear spray sealers work well.
Weathering Supplies ($10-$20): Black and brown acrylic paint for washing, silver paint for metallic wear, makeup sponges for application.
Different materials require different glues:
Most cosplays require wigs since matching natural hair to character hair is difficult:
Cosplay Wig ($15-$60): Arda Wigs, Epic Cosplay, and Amazon (look for good reviews) offer quality options. Check out our wig collection for character-specific styles.
Wig Cap ($3-$8): Keeps your natural hair contained and creates a smooth base.
Wig Styling Supplies ($15-$30): Heat-safe scissors, wide-tooth comb, wig spray/gel, bobby pins, and foam wig head.
Don't skip this category—your health matters!
As you advance, you might want:
Now let's walk through the actual process of making costumes from start to finish.
Before cutting a single piece of material, collect as much visual reference as possible:
Screenshot Collection: Take screenshots of your character from multiple angles—front, back, sides, close-ups of details. Look for:
Create a Reference Board: Use Pinterest, a physical poster board, or a digital folder to organize everything. Include:
Study Existing Cosplays: Search social media, convention photos, and cosplay forums to see how others interpreted the character. Learn from their successes and challenges without directly copying their work.
Patterns are templates that guide your construction. You have several options:
Commercial Patterns: Simplicity, McCall's, and Butterick all offer cosplay-specific pattern lines. These provide:
Modify Existing Patterns: Often cheaper than starting from scratch. Buy a basic pattern (tunic, jacket, pants) and alter it to match your character.
Free Online Patterns: Websites like Kamui Cosplay, Punished Props, and community forums offer free patterns for popular characters and prop types.
Draft Your Own: For simple pieces or when nothing else matches:
Pepakura for 3D Pieces: Free software that unfolds 3D models into 2D patterns you can print and use for foam or thermoplastic armor.
Armed with your reference and patterns, it's shopping time:
Fabric Choices:
How Much to Buy: Patterns tell you yardage requirements, but buy an extra ½ to 1 yard for mistakes and testing. Better to have too much than run out mid-project!
Where to Shop: We'll cover this in detail later, but mix online and local shopping for the best selection and prices.
Measure twice, cut once—this old saying saves countless materials and headaches:
Prepare Your Workspace: Clear a large flat surface. The floor works if you don't have a big table. Ensure good lighting.
Lay Out Fabric Properly: Follow pattern instructions for grain lines and folding. Pin pattern pieces to fabric securely.
Cut Carefully: Use sharp fabric scissors and smooth, continuous cuts. Don't lift the fabric off your cutting surface—this prevents distortion.
Mark Important Points: Transfer any pattern markings (darts, notches, button placements) to your fabric using tailor's chalk or washable markers.
Label Everything: Tag each piece with what it is and which side is up. Future you will be grateful.
Foam Cutting Tips:
This is where your costume comes to life:
Follow the Order: Patterns provide a sequence for a reason. Generally:
Sewing Techniques for Beginners:
Foam Assembly:
Common Construction Challenges:
Transform raw materials into screen-accurate pieces:
Primer Coat: Seal foam and thermoplastics with 3-4 thin coats of:
Let each coat dry completely (2-4 hours).
Base Coat: Apply your main color in 2-3 thin coats. Thin coats prevent drips and dry faster. Use:
Detail Painting:
Weathering for Realism:
Most characters don't have pristine costumes. Add:
Sealing: Protect your work with 2-3 coats of clear sealer (Mod Podge, Minwax, or spray sealer). Matte sealer looks realistic, gloss adds shine.
A good wig can make or break a cosplay:
Preparation: Brush out the wig gently, working from ends to roots. Never brush while wearing it!
Cutting and Shaping:
Styling Products:
Color Modifications: Use temporary hair spray, chalk, or alcohol-based markers for streaks and highlights.
Bring all the pieces together:
Put on the complete costume and move around:
Make adjustments based on your findings. It's much easier to fix issues at home than at a convention!
Let's talk real numbers. Understanding cosplay costs helps you budget appropriately and avoid financial stress.
Perfect for absolute beginners or budget-conscious cosplayers:
Materials:
Examples: School uniform characters, casual everyday outfits, simple fantasy tunics
Cost-Saving Tips:
Most first cosplays with some armor or special elements fall here:
Materials:
Examples: Characters with armor pieces, detailed costumes, characters with props
Advanced builds with extensive armor, props, or intricate details:
Materials:
Examples: Full suits of armor, mecha costumes, characters with large weapons, highly detailed fantasy characters
Don't forget these often-overlooked expenses:
Tools and Equipment ($100-$300 first-time investment): While you'll use these for multiple costumes, the initial purchase adds up.
Mistakes and Do-Overs ($20-$100): Everyone messes up. Budget 15-20% extra for materials you'll need to replace.
Shoes ($20-$100): Character-accurate footwear can be surprisingly expensive. Check out our accessories collection for costume-friendly options.
Makeup and Body Paint ($15-$50): If your character has unusual skin tones, scars, or special effects.
Convention Badge ($30-$100+): Don't forget the actual entry cost to the event!
Photos ($20-$100): Professional convention photographers often charge for digital files.
Travel and Accommodation ($100-$500+): If attending out-of-town conventions.
Buy Off-Season: Halloween supplies go on sale in November. Craft stores run 40-60% off coupons regularly.
Shop Your Stash: Before buying new materials, check what you already have. That random fabric you bought two years ago might be perfect.
Split Costs: Making similar costumes with friends? Buy materials in bulk and split the cost.
Reuse and Repurpose: Save scraps, keep packaging materials (great for building props), and reuse tools across projects.
Gradual Investment: Don't buy every tool at once. Start with basics and add specialized tools as needed.
Test on Cheap Materials First: Before using expensive Worbla, test your technique on craft foam. Before cutting into $30/yard fabric, practice on muslin.
Learn from others' experiences to make your first cosplay journey smoother:
The Mistake: Choosing a character with extreme complexity for your first build—full armor, intricate embroidery, electronics, enormous props.
Why It Happens: Enthusiasm and underestimating the time and skill required.
The Fix: Start simple. Master basic techniques on an easier costume, then level up. There's no shame in building skills gradually. Your dream costume will turn out better if you have experience first.
The Mistake: Buying expensive fabric or foam and diving straight into cutting final pieces.
Why It Happens: Eagerness to start and not wanting to "waste" materials on tests.
The Fix: Always test on scraps first. Try your paint on foam pieces before painting the finished armor. Sew test seams with your actual fabric to check tension and stitch quality. These small tests prevent expensive mistakes.
The Mistake: Starting a costume two weeks before a convention when it realistically needs two months.
Why It Happens: Underestimating how long each step takes, especially as a beginner.
The Fix: Create a realistic timeline with buffer time. A moderate costume typically requires 30-60 hours of work. That's 2-3 hours every day for a month, or full weekends for two months. Start early!
The Mistake: Starting with just one or two images of your character.
Why It Happens: Assuming you know what the costume looks like from memory.
The Fix: Collect 20-30 reference images from every angle. You'll discover details you never noticed. Create a physical or digital reference board you can glance at while working.
The Mistake: Cutting expensive fabric without testing the pattern first.
Why It Happens: Impatience and not wanting to "waste time" on test versions.
The Fix: Make a mockup with cheap fabric (muslin, old bedsheets, clearance cotton). This reveals fit issues, pattern problems, and construction challenges before you cut into your good materials. Professional costumers always mockup first.
The Mistake: Hot gluing foam armor or using fabric glue on vinyl.
Why It Happens: Using whatever glue is handy without researching compatibility.
The Fix: Match adhesive to materials:
The Mistake: Painting directly on foam without primer, or only one thin coat of sealer.
Why It Happens: Not understanding how porous foam is, or trying to save time.
The Fix: Apply 3-4 thin coats of primer/sealer, letting each dry completely. A properly sealed surface takes paint better, looks smoother, and lasts longer. This step is not optional!
The Mistake: Creating a costume that looks perfect but can't be worn for more than 30 minutes.
Why It Happens: Focusing entirely on appearance without considering wearability.
The Fix: Build in:
The Mistake: Building a massive prop or wings that don't fit in your car or through convention doors.
Why It Happens: Getting caught up in the build without thinking about logistics.
The Fix: Design pieces to break down into portable sections. Use magnets, velcro, or simple connectors so you can assemble on-site. Measure doorways and your vehicle before building oversized pieces.
The Mistake: Struggling alone with problems when the cosplay community is incredibly helpful.
Why It Happens: Not wanting to bother people or feeling like you should figure it out yourself.
The Fix: Join cosplay communities on Reddit (r/cosplay, r/cosplayhelp), Facebook groups, and Discord servers. Post your questions with clear photos. Most cosplayers love helping beginners because they remember their own first builds. The community wants you to succeed!
Knowing where to shop saves money and ensures you get the right materials.
General Cosplay Supplies:
Fabric Stores:
Wigs:
Craft and Tools:
Props and Accessories:
3D Printing Services:
Fabric Stores: JoAnn, Hancock Fabrics, local fabric shops allow you to see and feel materials before buying. Staff can often help with recommendations.
Hardware Stores: Home Depot, Lowe's, and Ace Hardware stock:
Craft Stores: Michaels, Hobby Lobby, and AC Moore offer:
Thrift Stores: Goodwill, Salvation Army, and local thrift shops are goldmines for:
Party Supply Stores: Party City and Halloween stores (especially September-November) stock:
Use Coupons: Craft stores offer rotating 40-60% off coupons. Sign up for emails and plan purchases around sales.
Compare Prices: The same EVA foam might be $15 on Amazon and $25 at a craft store. Shop around!
Buy in Bulk with Friends: Split large orders to save on shipping and get quantity discounts.
Check Multiple Sources: Sometimes Amazon is cheapest, sometimes dedicated shops have better prices. Don't assume!
Read Reviews: Especially for wigs and specialty items, reviews tell you about true color, quality, and sizing.
Plan Shipping Times: Domestic shipping usually takes 3-7 days. International orders can take 2-6 weeks. Order early!
Sometimes buying is smarter than making. Here's an honest assessment.
Complex Footwear: Making shoes from scratch requires specialized equipment and skills. It's usually more cost-effective to buy boots or shoes and modify them with paint, covers, or add-ons. Budget $30-$80 for base shoes.
Wigs: Unless you're a professional wig stylist, buying a pre-styled or easily styleable wig saves enormous time and frustration. Quality cosplay wigs run $20-$60. Browse our wig collection for ready-to-wear options.
Small Intricate Props: 3D printed accessories, jewelry, and detailed small props often cost less to buy than the materials and time to make them. Etsy has thousands of cosplay-specific items.
Base Garments: Plain pants, shirts, and shoes are often cheaper to buy than to make from scratch. Thrift stores and discount retailers (Target, H&M, Old Navy) work great.
Professional Elements: If your costume needs high-quality screen-printed designs, professional embroidery, or complex electronics, commissioning these specific elements while DIYing the rest can be the smart choice.
Time is Limited: If a convention is three weeks away and you're just starting, buying pre-made pieces or even a full costume from our cosplay collection might be your best bet. You can always upgrade to a DIY version later.
Specialized Materials: Items like real metal chainmail, professionally made leather pieces, or complex mechanical parts might be beyond a beginner's scope.
Core Costume Pieces: The main tunic, dress, pants, or jacket is usually worth making. These are the largest visual elements and making them ensures proper fit and color match.
Armor and Props: EVA foam armor and props are actually easier for beginners to make than many sewn garments. Plus, you save significant money—a professional foam armor piece might cost $100-$300, while you can make it for $20-$40 in materials.
Character-Specific Details: Unique symbols, emblems, and design elements that define your character should be made to ensure accuracy.
You Want the Experience: If building skills is part of your goal, DIY is the way even if buying would be easier. The experience is valuable!
Budget is Tight: DIY almost always costs less than commissioning, even factoring in mistakes and learning curve.
Custom Fit is Important: Pre-made costumes rarely fit perfectly. Making your own means you can tailor every piece to your exact measurements.
Most successful beginner cosplays mix bought and made elements:
Common Combinations:
Example 1 - Link from Zelda:
Example 2 - Superhero Costume:
Example 3 - Anime Character:
This approach lets you focus your time and budget on the most impactful pieces while keeping the project manageable.
Cosplay is more fun when shared with others. Here's how to connect with fellow makers.
Reddit:
Facebook Groups:
Discord Servers:
Instagram and TikTok:
YouTube:
Conventions:
Convention Activities:
Local Meetups:
Cosplay-Friendly Stores:
Respect Boundaries: Always ask before touching costumes or props, and definitely before taking photos. "Cosplay is not consent" is the golden rule.
Give Credit: If you used someone's tutorial, pattern, or advice, credit them when sharing your work.
Be Supportive: Remember how it felt to be a beginner. Encourage new cosplayers and share knowledge generously.
Accept Critique Gracefully: If entering contests or asking for feedback, be open to constructive criticism. It helps you improve!
Share Resources: If you found a great deal or learned a useful trick, share it! The community thrives on collaboration.
Don't Compare: Everyone's at a different skill level and budget. Focus on your own progress, not measuring against others.
Photography:
Social Media Presence:
Portfolio Sites:
For a beginner working on a moderate-complexity costume, expect 30-60 hours of work spread over 4-8 weeks. Simple costumes might only take 15-20 hours (2-3 weeks of part-time work), while complex builds can require 100+ hours (3-6 months). The key is not rushing—starting early means less stress and better results.
Absolutely! Many amazing cosplays use no sewing at all. EVA foam armor, thermoplastic builds, and modified purchased garments can create impressive costumes without touching a sewing machine. That said, learning basic hand-sewing (even just straight stitches) opens up many more possibilities and is easier than you think. Many libraries and craft stores offer free beginner sewing classes.
The easiest characters have simple, recognizable silhouettes with minimal pieces. Great starter options include: Link (Legend of Zelda) with his tunic and accessories, various My Hero Academia students in their school uniforms, Pokemon trainers with everyday clothes, or classic Star Trek uniforms. Choose a character you love from a recognizable series with clothing you can potentially modify from thrift store finds.
Plan for $100-$250 for a moderate first costume including basic tools. This breaks down to roughly $50-100 for materials, $30-60 for a wig, $20-40 for shoes, and $30-50 for tools and finishing supplies. You can go cheaper ($50-75) by thrifting more and choosing a very simple character, or spend more ($300+) if selecting a character with armor or complex elements. Remember, tools are one-time investments you'll use for future costumes.
Beyond conventions, cosplayers wear their costumes to: local comic shops for new releases or events, movie premieres (especially for relevant characters), Halloween parties, charity events and hospital visits (many organizations coordinate cosplay visits for kids), photoshoots at scenic locations, renaissance fairs and themed events, game release parties, and casual hangouts with other cosplayers. Some people even create content for social media or streaming. Check our Halloween costumes collection for dual-purpose options!
Making your first cosplay costume is an adventure that combines creativity, problem-solving, and craftsmanship. While it might seem overwhelming at first, remember that every expert cosplayer started exactly where you are now—with enthusiasm, a character they loved, and zero experience.
The key to success is starting simple, learning as you go, and enjoying the process. Don't aim for perfection on your first build. Aim for completion. Each costume you make teaches you new skills and builds your confidence for more complex projects.
The cosplay community is welcoming, supportive, and excited to see what you create. So gather your references, pick up some materials, and start bringing your favorite character to life. Whether you're shopping our cosplay collection for inspiration, browsing wigs to match your character, or hunting for the perfect accessories to complete your look, The Costume Shop is here to support your creative journey.
Your first cosplay is waiting to be made. What character will you choose?
The Costume Shop Team has been helping cosplayers and costume enthusiasts bring their creative visions to life for over a decade. Visit us at thecostumeshop.com for quality costumes, accessories, and inspiration for your next project.
Attention all aspiring letter carriers and mail enthusiasts! Prepare to deliver a package of seductive style and naughty charm with our Sexy Post O...
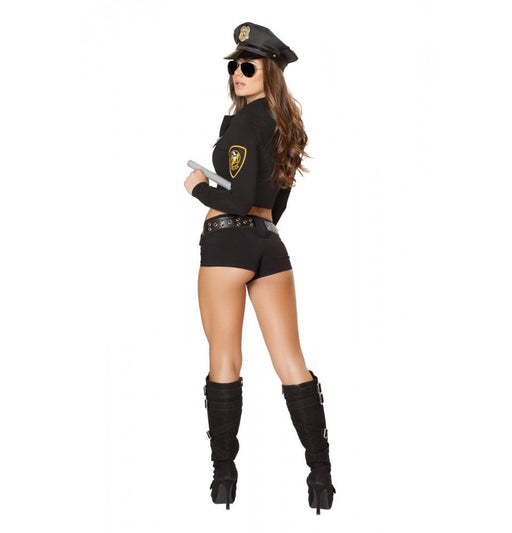
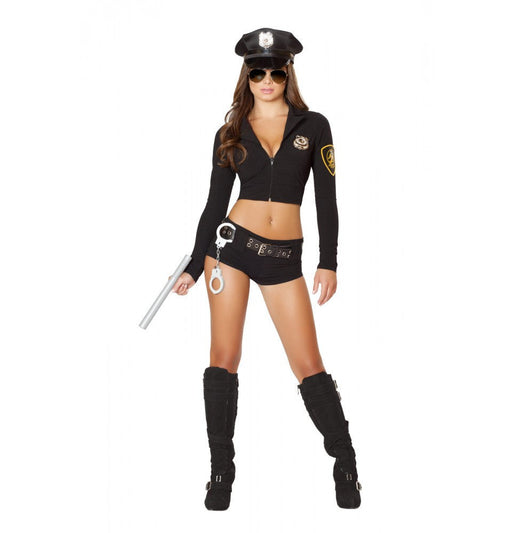
View full details🚓 Enforce Fun with a Dash of Flair! Step into the role of authority with the Sexy Police Officer Hottie Costume from www.Costume-shop.com. Designed...
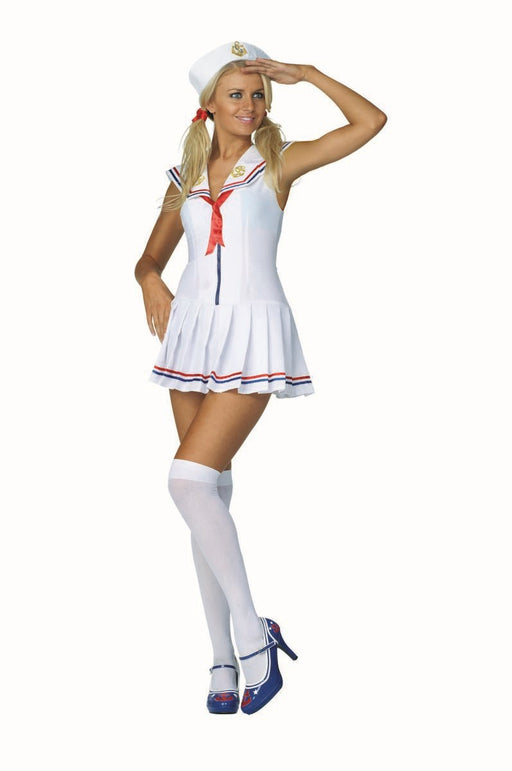
View full details🚢 Navigate the High Seas of Fashion! Command attention at your next party with the Sailor's Delight Costume from www.Costume-shop.com. Perfect for ...
View full detailsGet ready to set hearts racing and temperatures soaring with our Hot Aid Nurse Costume! This seductive outfit is perfect for those who want to unle...
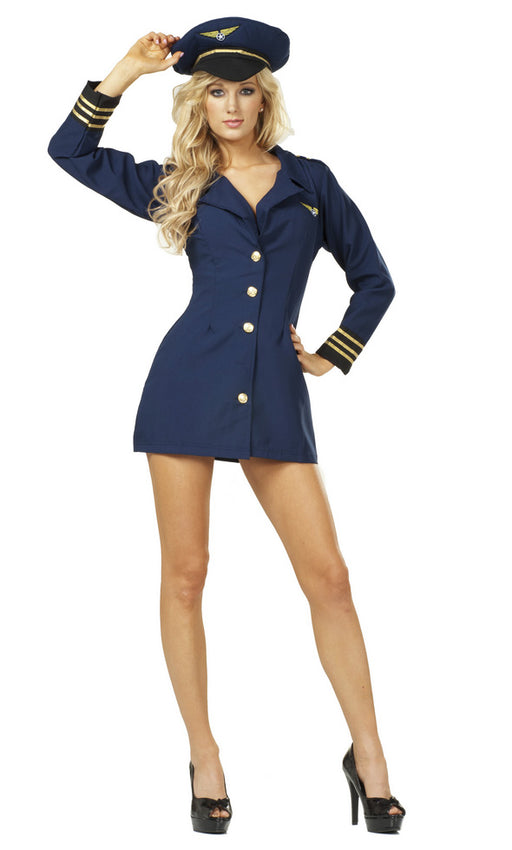
View full details🌐 Take Flight with Flair! Elevate your costume game with the Flight Captain Pilot Costume from . Perfect for themed parties, Halloween, or any even...
View full details